Solakon ONE Integration
The stromleser.one can be integrated as a smart meter into your Solakon ONE storage system. The smart meter records your household consumption so that the storage system covers your exact power demand and no energy flows unused into the grid. The following steps explain how it all works.
This integration is only available for stromleser.one devices.
Requirements
Before you start the setup, make sure that:
- your Solakon ONE is set up in the Solakon app and online
- your stromleser.one is installed at the electricity meter and connected to the same Wi-Fi as the Solakon ONE
- the Solakon app is up to date
Before installation, keep in mind that your electricity meter must be unlocked via PIN entry so the stromleser.one can read and transmit the data in real time. You can find out how this works here.
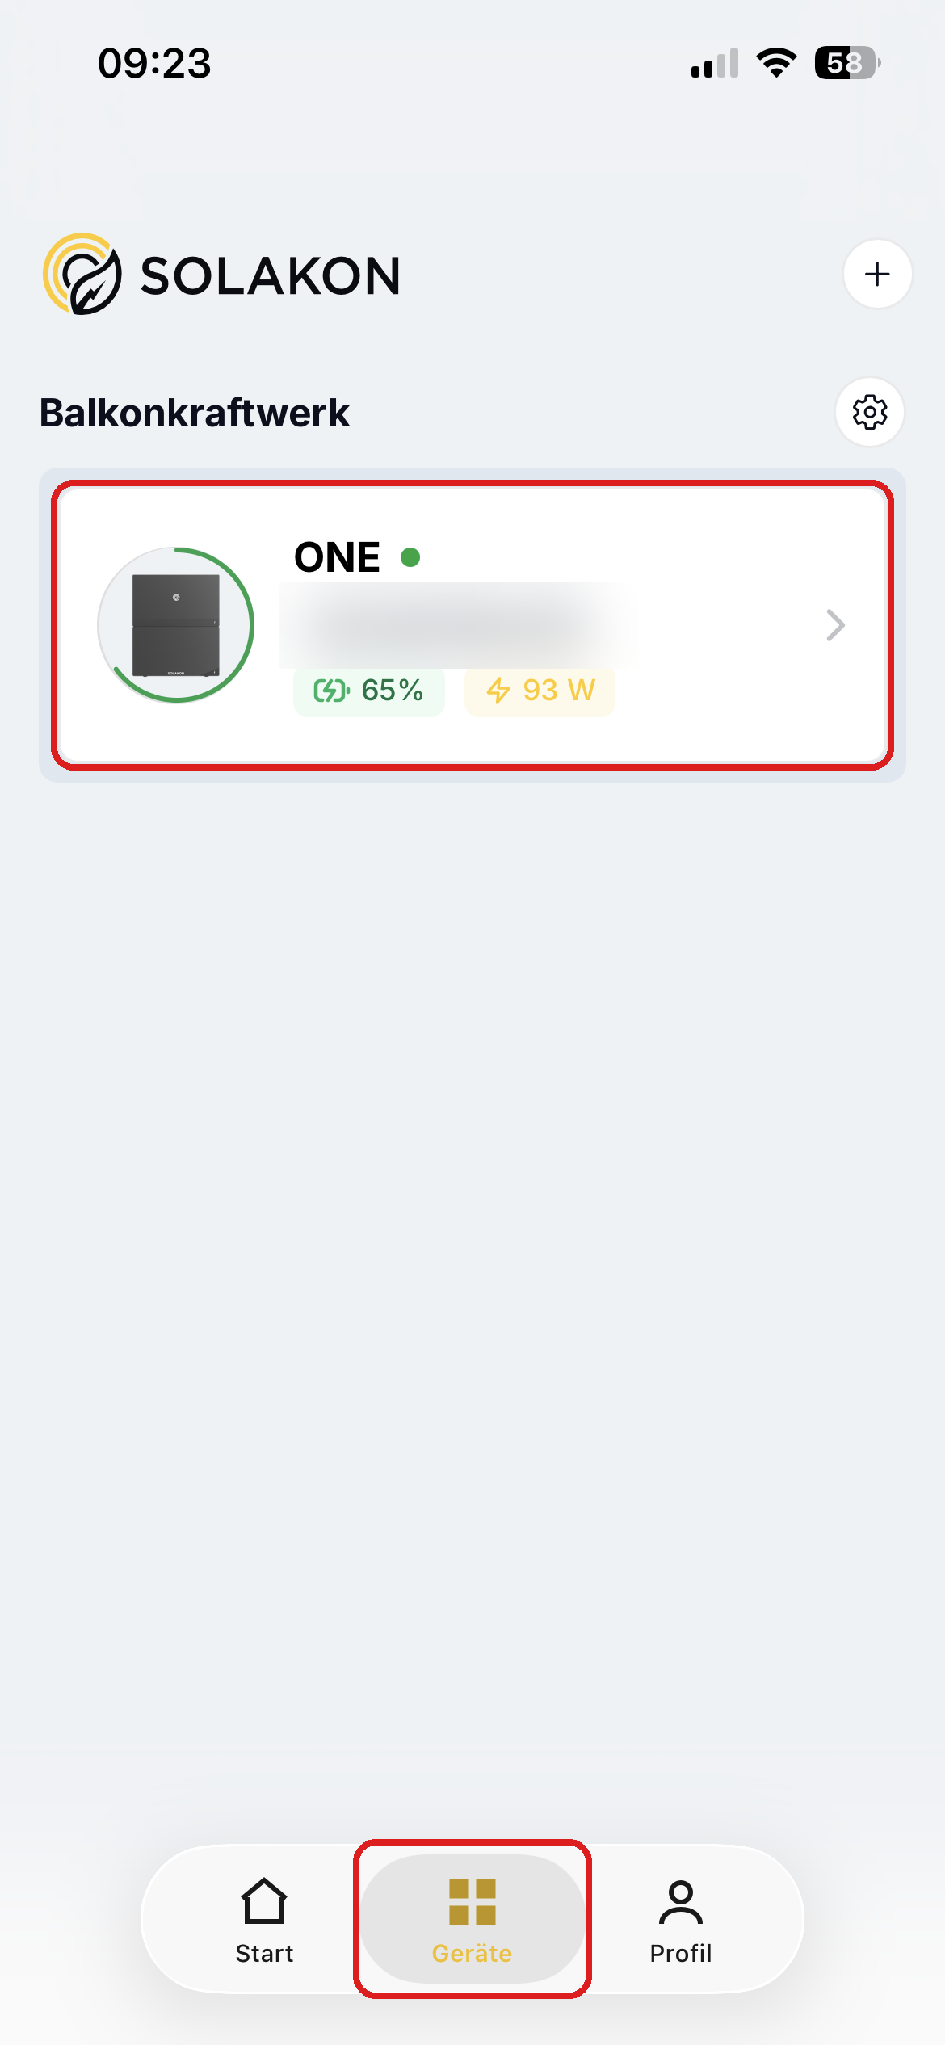
Step 1: Open the device
- Switch to Devices in the bottom tab bar
- Tap your device group
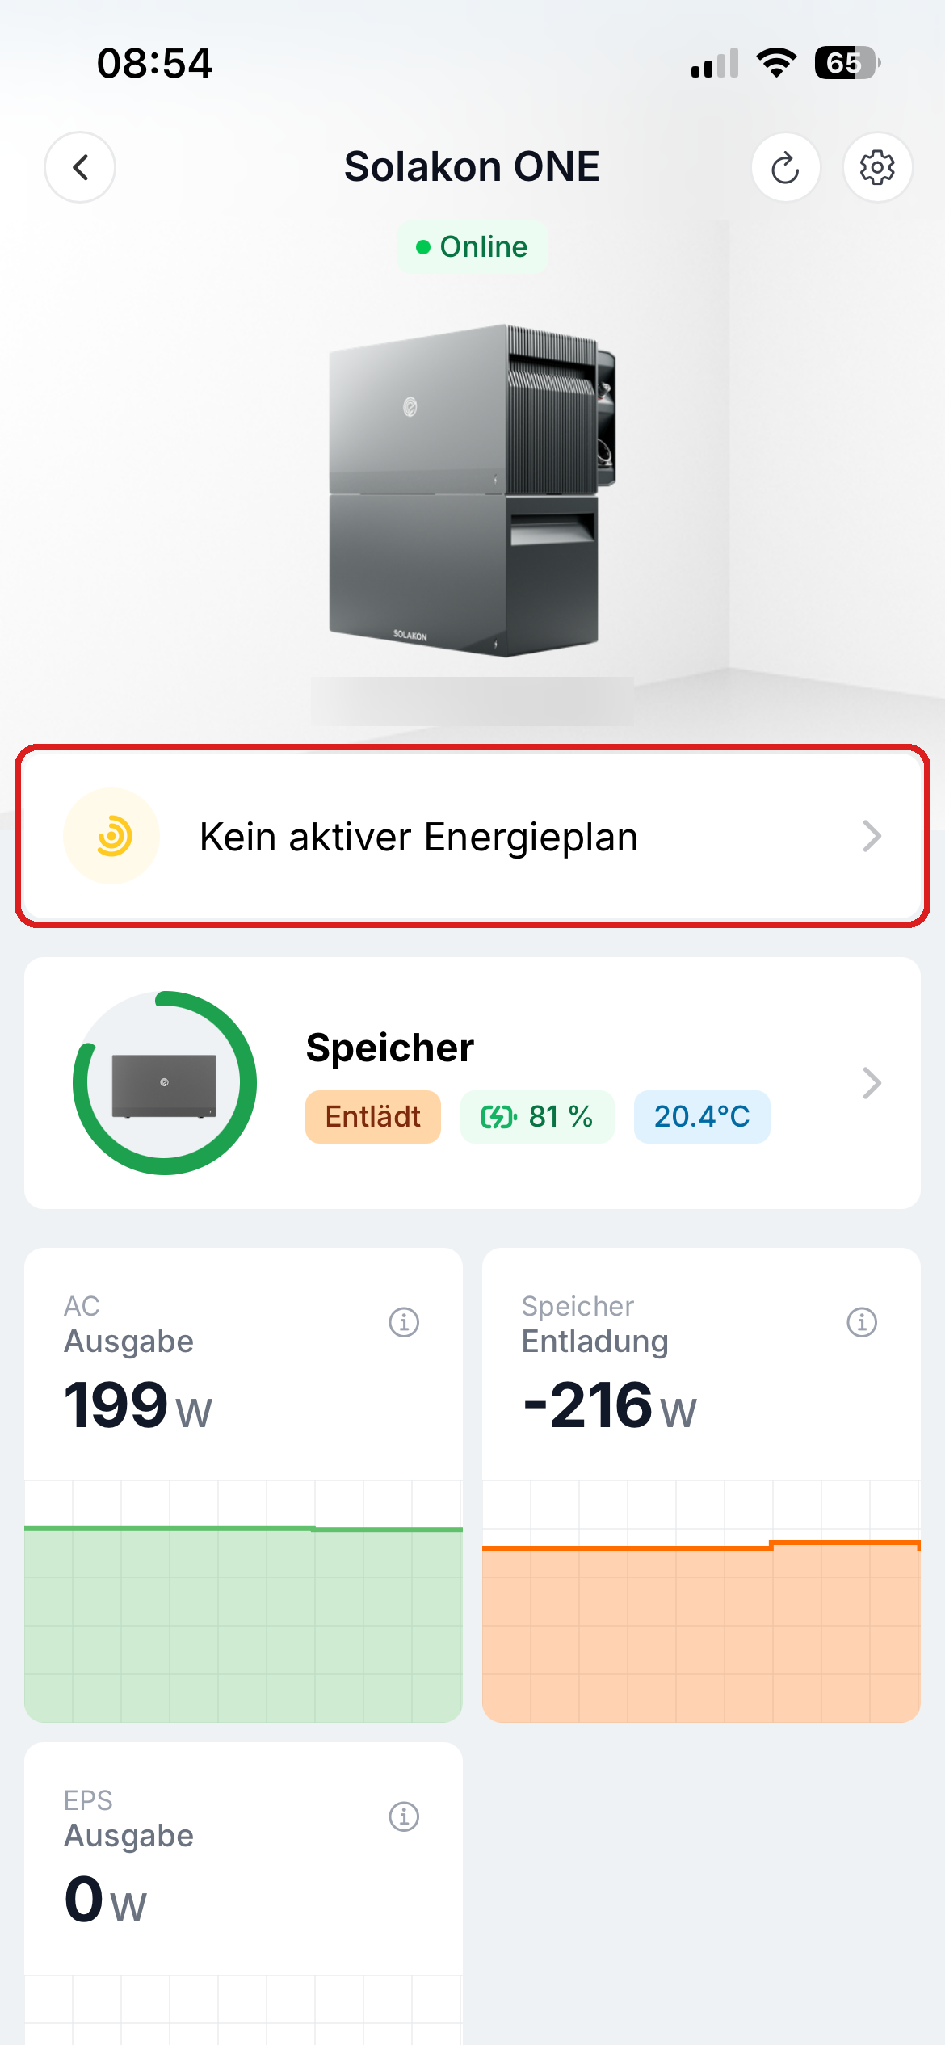
Step 2: Open the energy plan
- In the device view, tap No active energy plan
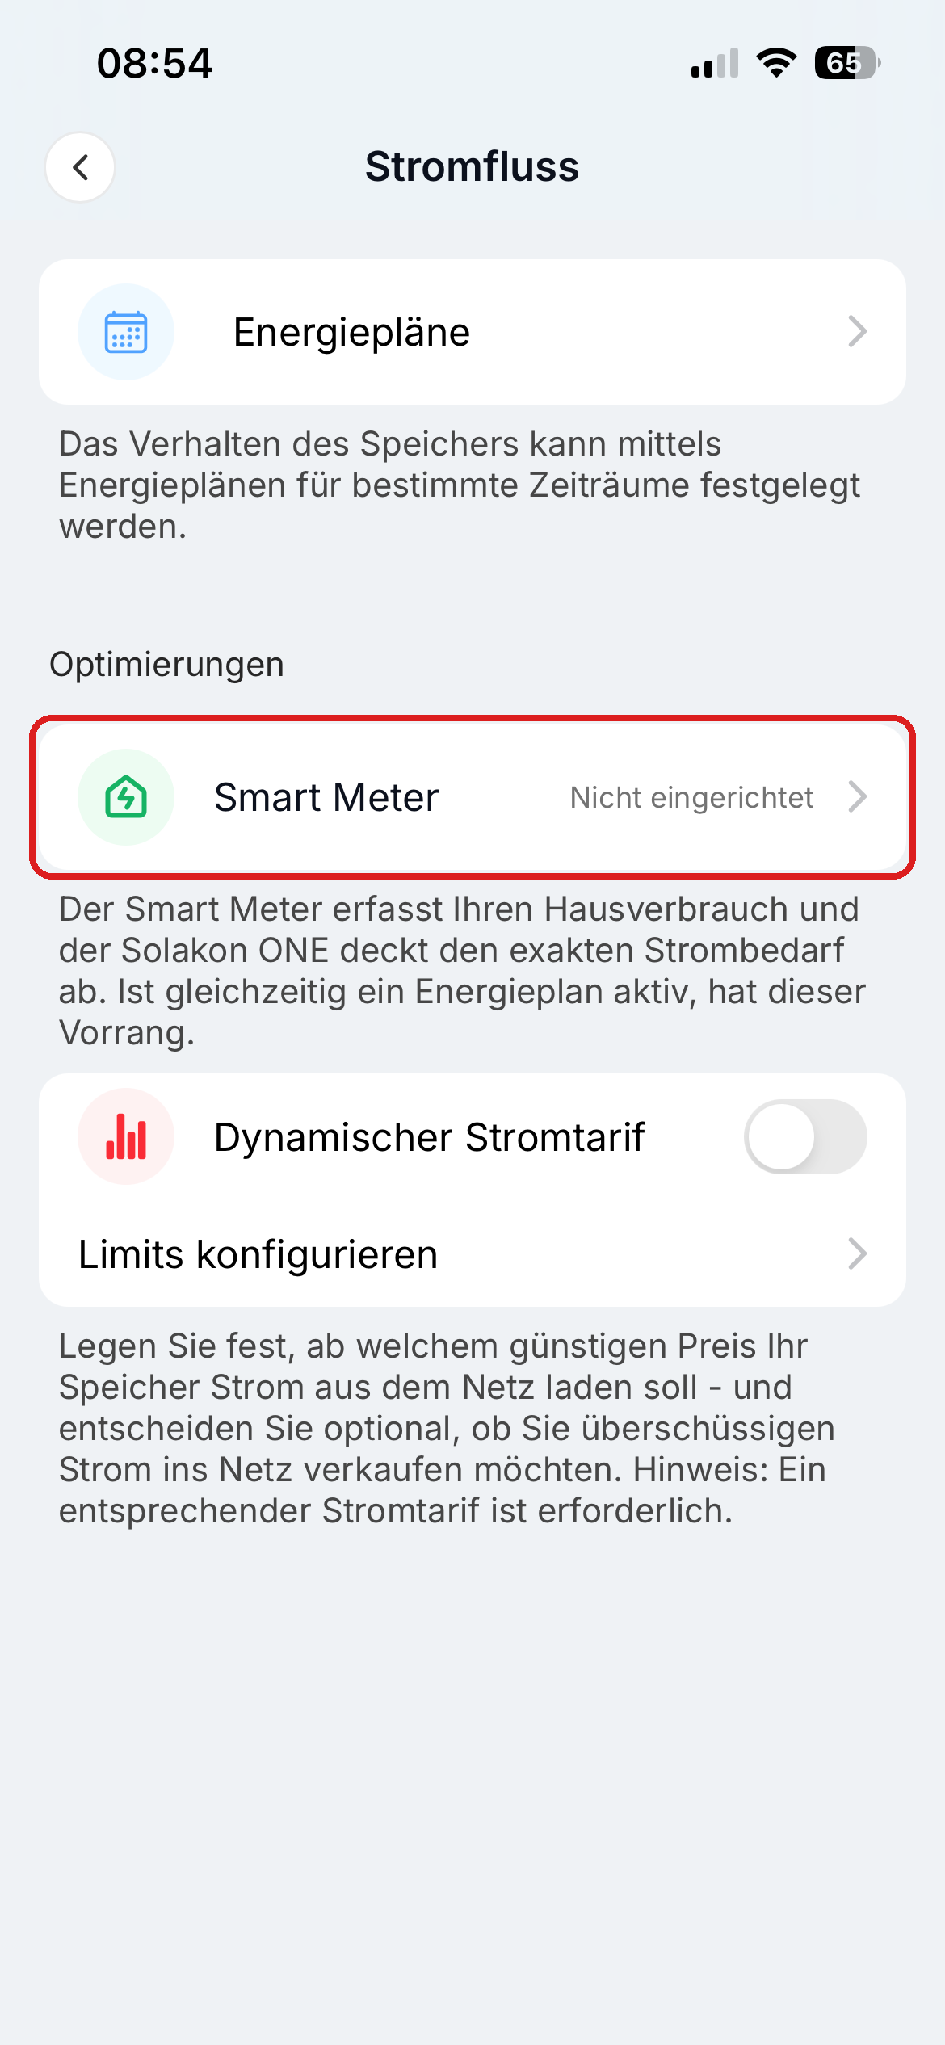
Step 3: Select Smart Meter
- Under Optimizations, tap Smart Meter
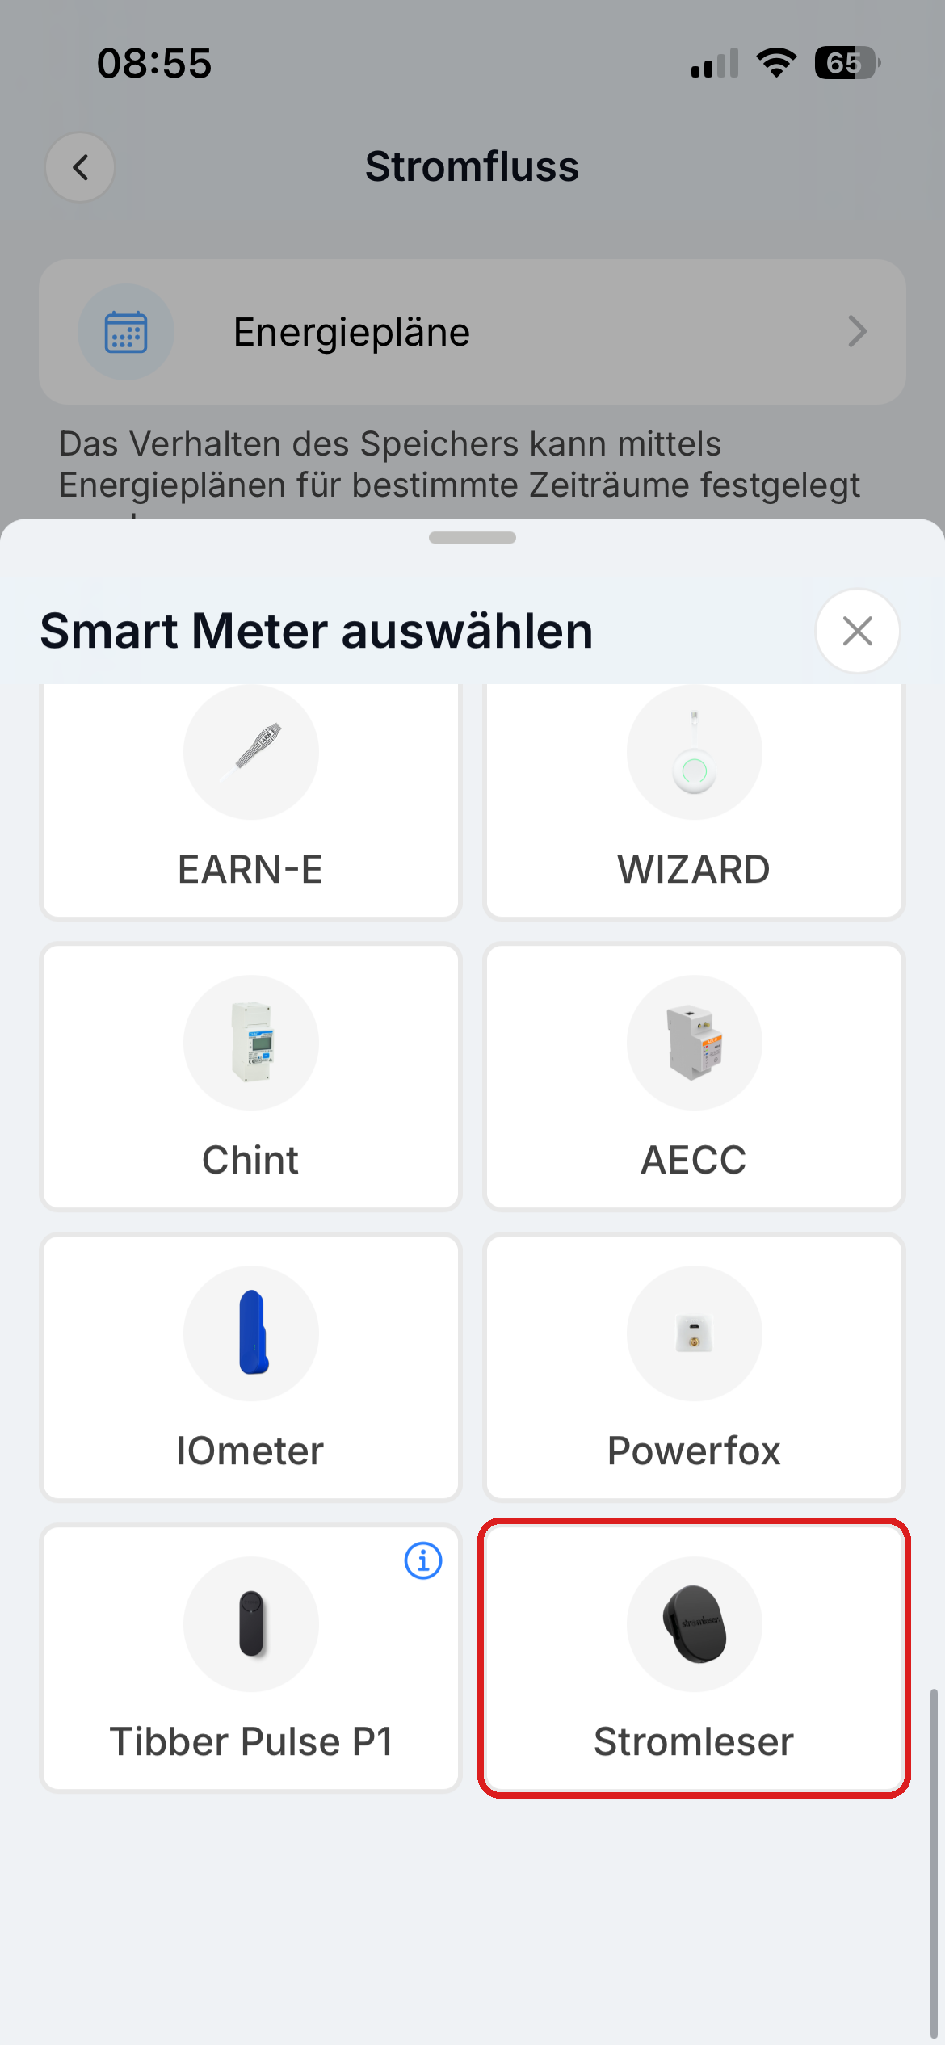
Step 4: Select Stromleser
- Choose Stromleser from the list of supported smart meters
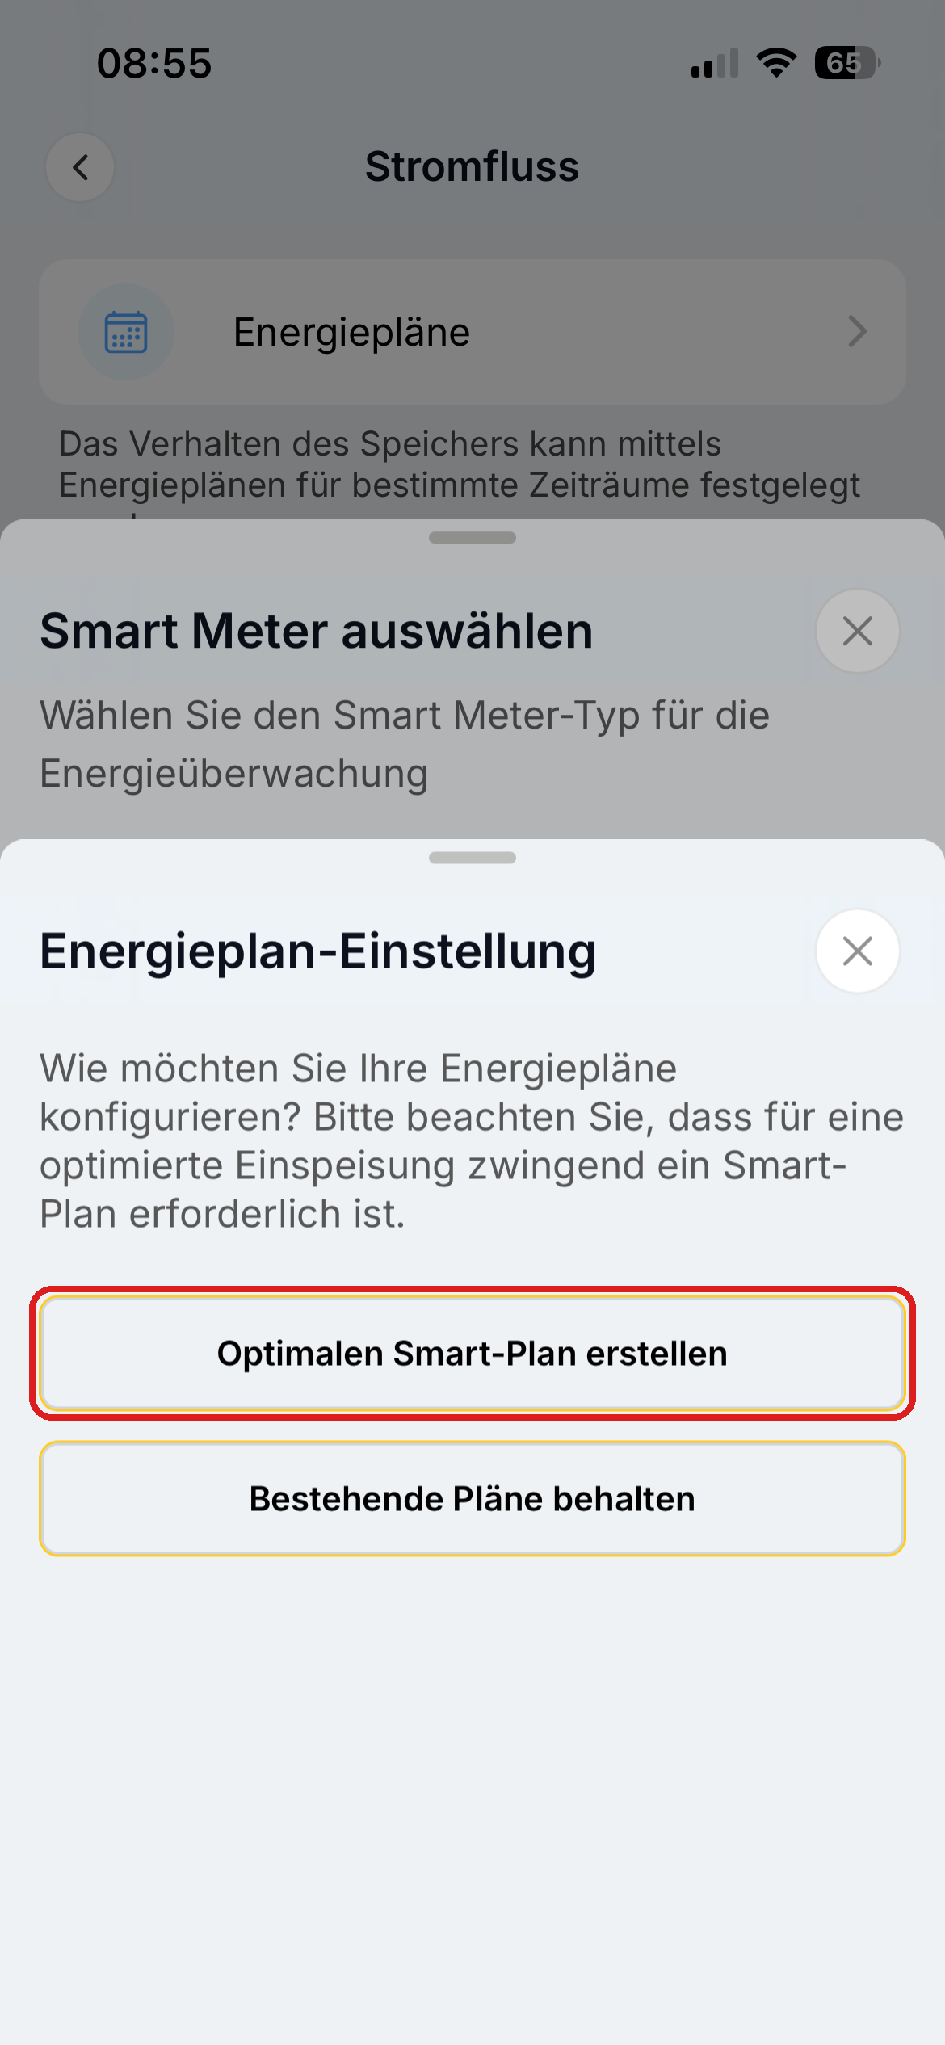
Step 5: Configure the energy plan
- Tap Create optimal smart plan (recommended)
- Alternatively, you can keep your existing energy plans with Keep existing plans
Done!
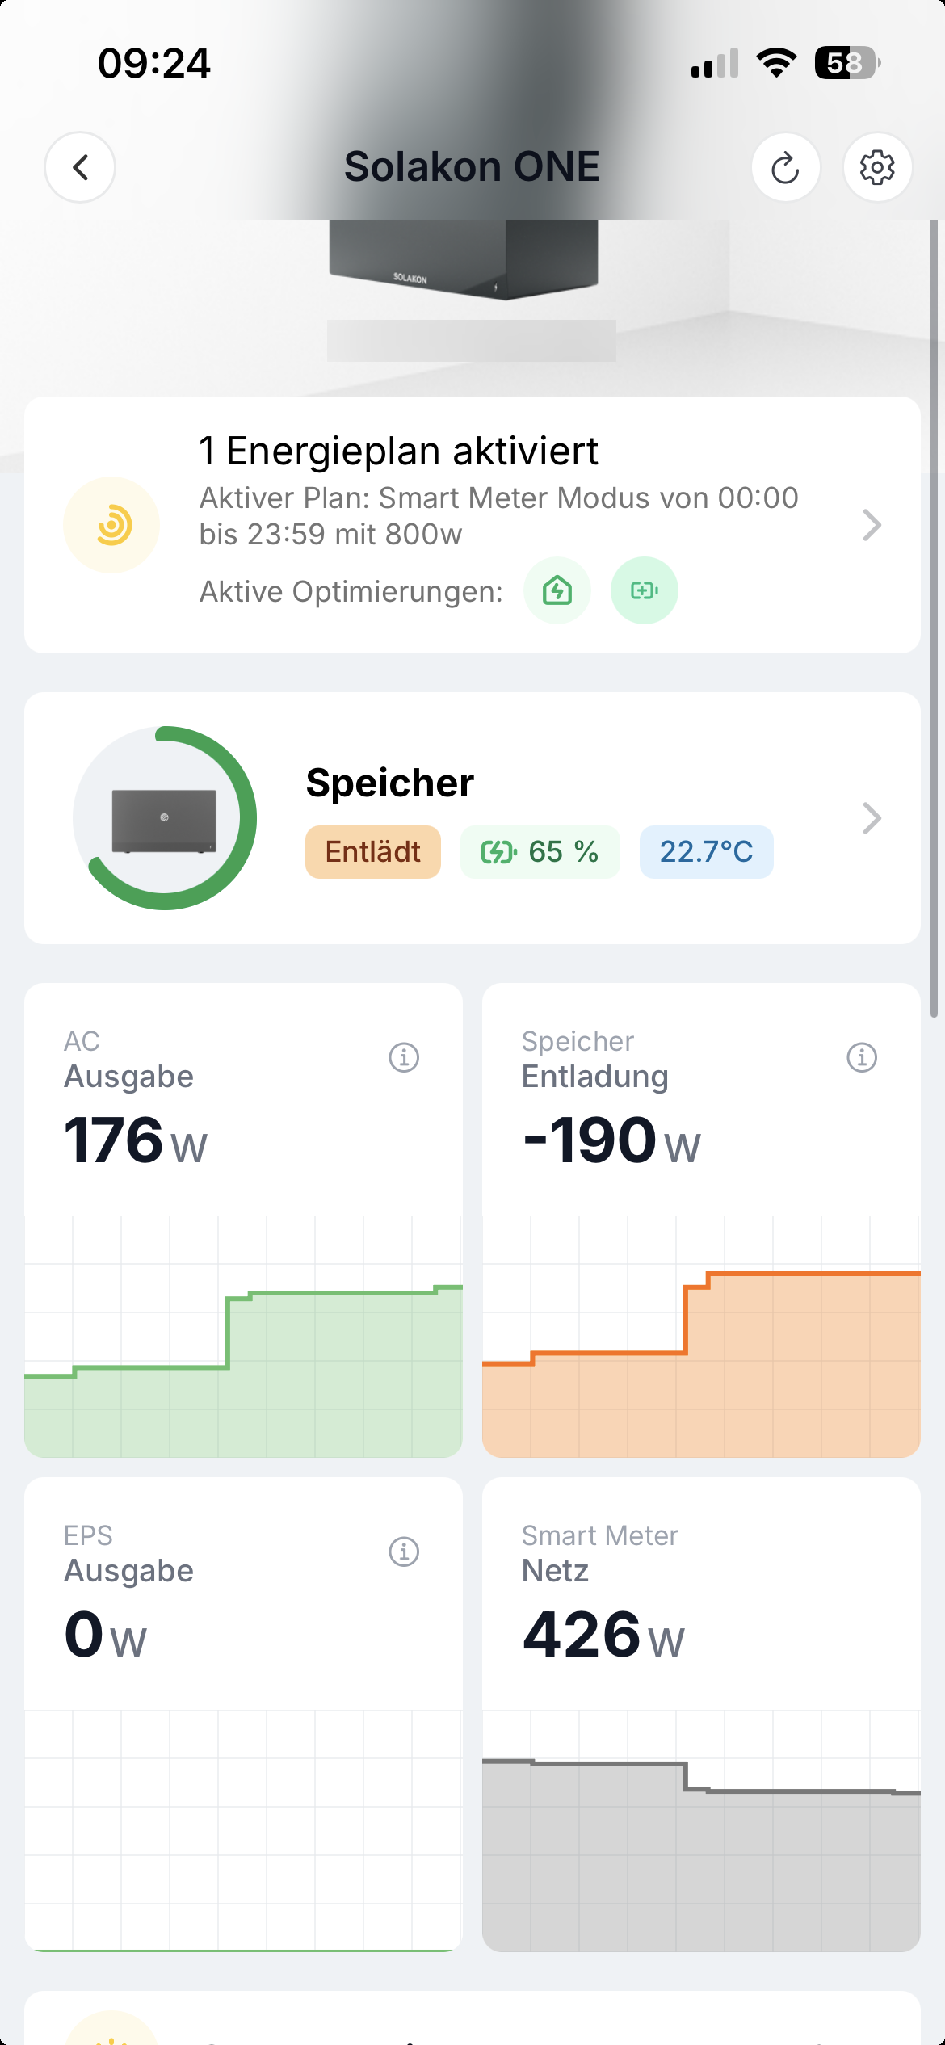
Your smart meter is now connected to the Solakon ONE. In the device view you see the active energy plan (Smart Meter mode) and the new Smart Meter Grid tile with your current grid draw. The storage system now automatically adjusts its output to your household consumption.
All data and charts from the stromleser.one remain visible in the energieleser app, of course.
Common problems
Stromleser is not found
- Make sure your stromleser.one and your Solakon ONE are on the same Wi-Fi
- Check that the stromleser.one is online in the energieleser app and delivering live data
- Make sure the Solakon app is up to date
The energy plan cannot be created
- The Smart Meter mode requires a smart meter — make sure the Stromleser is selected as the smart meter and successfully connected (see steps 3 and 4)